SVG wedding, anniversary, and romantic file


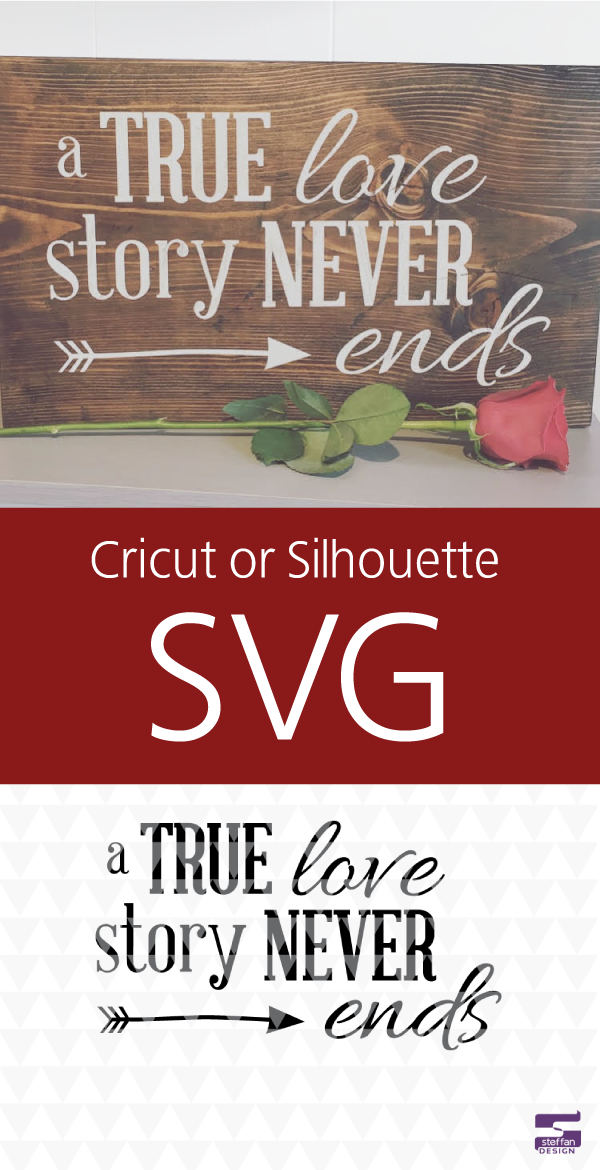
Since Valentine’s day is tomorrow I wanted to spotlight one of the Valentine’s Day/Romantic SVG designs that I sell in my Etsy shop. ‘A true love story never ends’ is probably one of my favorite designs. Not only would it make cute DIY Valentine’s Day decor, this design could be used to make an every day home decor item or be used for a special event like an anniversary or wedding decor item. Cutting out this file with a cricut or silhouette is easy. As a result there are loads of DIY projects can be made with this design. Hear are a few simple ideas to get your creative juices flowing.

1. Print & Place In a Picture Frame

Printing this design in black and white and placing it inside a picture frame is probably one of the simplest ways to using this design. As a result of being on a tight budget shopping for picture frames at thrift stores is my favorite route. Thrift store frames are inexpensive and with the help of a little spray paint they can all be made the same color.

A true love story never ends design in a simple picture frame surrounded by several roses creating in a heart.

2. Vinyl Decal

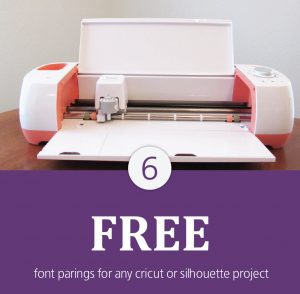
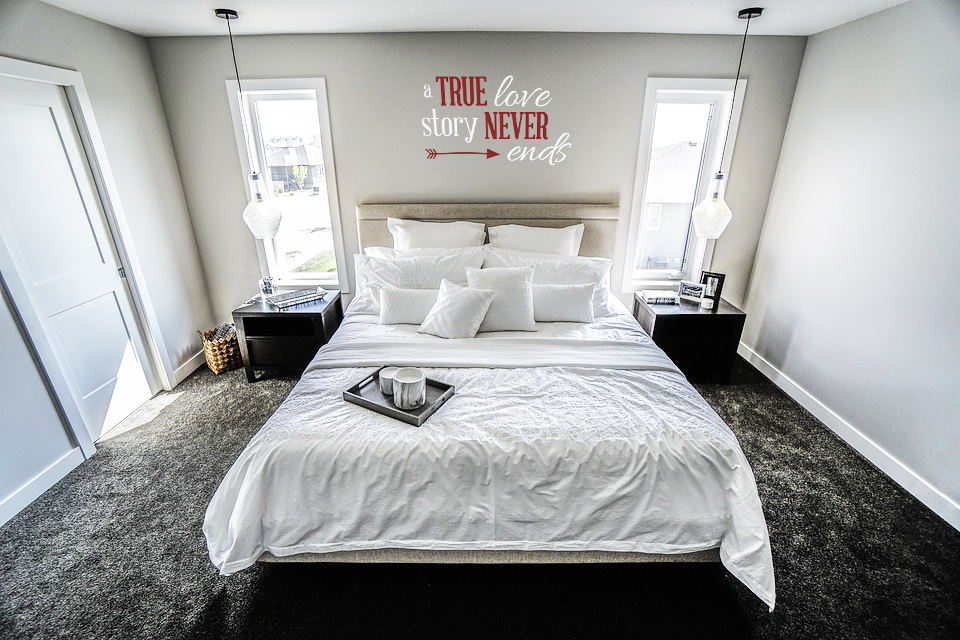
A die cutting machine like a cricut or silhouette can be used to create a decal of this romantic SVG design. You can follow How to cut an SVG with cricut design center tutorial if you aren’t sure how to cut out an SVG file. Don’t have a cricut or silouhette? Don’t worry! Local sign shops can make this design into a decal. Just take the SVG file to them on a flash drive. The adhesive vinyl sticks well to walls but doesn’t leave any sticky residue behind. As a result wall decals are perfect for decorating a wall in your house for both temporary or long term use.

A true love story never ends decal

3. Home Decor Projects

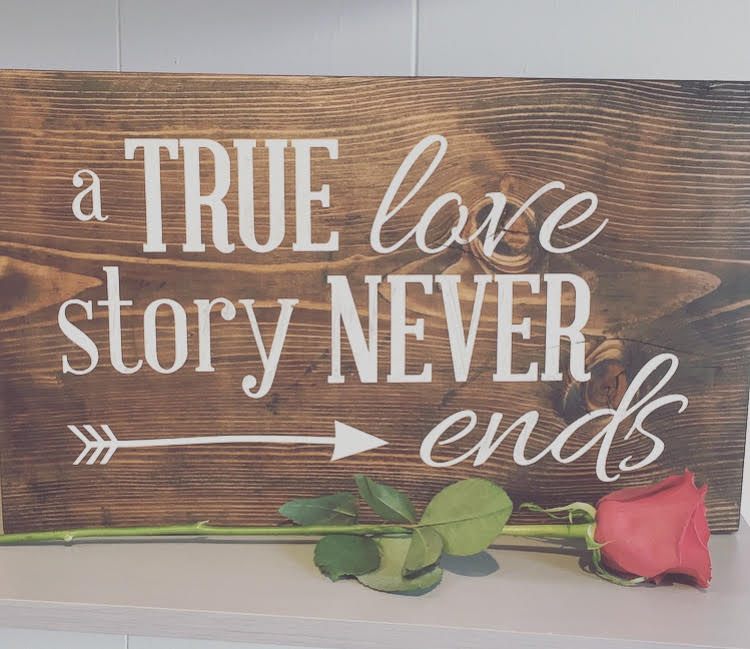
This anniversary SVG design is perfect for using in your DIY home decor projects as well. It looks awesome on a variety of mediums. My favorite medium to use is wood. With a little wood stain and some acrylic paint this plain Home Depot board is transformed into a classy home decor piece. Wood boards can be purchased from a variety of stores besides buying a huge board from a hardware store like Home Depot or Lows like I did. Hobby Lobby, Joann’s, Michael’s,  and surprisingly Walmart also have home decor isles with ready to use wood boards. Pallet board and barn wood can even be used to give your project a more rustic feel.

Wood board with the quote a true love story never ends painted on it

The possibilities are endless with this SVG design! ‘A true love story never ends’ SVG design is available at my etsy shop Steffan Design for $3.50. Personal use is included in that cost. A commercial license can be purchased in addition to this design if you want to sell a project that includes this design. After your payment has been confirmed a zip file containing the formats JPEG, PDF (editable), and SVG will be available to download.

A buy 2 get 1 free coupon will automatically be applied to your next purchase at Steffan Design Etsy shop by clicking the button below!

Recommended Posts
With Valentine’s Day around the corner I am always at a loss as to how to celebrate it. Having a tight budget and a young family makes it hard to exchange gifts or even go out to dinner some years. One of the simplest yet most effective Valentine’s Day gifts is a card with a love note or uplifting message. I had a co-worker that told me her and her husband decided that instead of spending money they didn’t have on Valentine’s Day they each picked out a nice Valentine’s Day card once and just exchange the same card every year with a new note on a separate piece of paper inside it. What a brilliant idea! Just think if you faithfully wrote a yearly note and saved it in the card. Over time wouldn’t it be so cool to get lots of love notes from over the years? It always feels good to receive a hand written love notes or cards. Cards are also the perfect way to express love and appreciation while on a budget. Sometimes with the chaos of life and kids it is hard to make a handmade Valentine’s Day card. In an attempt to try to make Valentine’s Day easier for myself I designed these free printable Valentine’s Day cards! How They Work These cards can be easily printed a home or at a print shop like Kinkos (Fedex) or Staples if you want a higher quality print. Printing them on card-stock paper would make them feel a little sturdier and feel more like an actual card, but any paper will work. These Valentine’s Day Cards are designed to not take up too much ink, but still look cute and thoughtful. The cards are in 3 separate PDF files. After these cards are printed and folded they are a 5×7 card. Card #1 & #2 are basic 5×7 cards. Once they are cut out, fold them in half and they are ready to use. Card #3 is a tri-fold card. It will take a little bit more effort to make, but turns out super cute! Using the guide marks on the margins of the card fold the two sides into the middle of the card. Once the card is cut out fold the 2 sides into the middle. A second page of hearts is provided. Cut out the hearts and glue them along the right side of the outside of the card. Downloading the cards is easy! After filling out your name and email an email will be sent to the address provided with a link to your FREE printable Valentine’s Day cards! Get all 3 printable Valentine’s Day cards and other FREE goodies delivered right to your inbox! * indicates required First Name * Email Address *     [...] Read more...
A few years ago my husband gave me a Cricut for Christmas. It have had so much fun with it! Consequently I have made several projects like wall decals, quotes on picture frames, stencils for painting projects and glass etching, shapes for making cards, fabric for iron on onesies, and even a felt quite book. I haven’t even touched the surface with all of the things this machine can do! It has been so much fun to plug in a SVG file and watch my Cricut cut it out perfectly! Today I want to show you how to cut an SVG file out with the Cricut design center. From my experience using SVG files has given me the best quality cuts. Since SVG files are vector based it doesn’t matter how large or small the SVG is it will always retain its quality. Step by Step Instructions Step 1: With your preferred browser open go to cricut.com/design. If you don’t already have an account please create one. Once you sign in if you are using the design center for the first time cricut.com/design will ask you if it is okay to install the software. Go ahead and follow the prompts to do so. Occasionally after you have downloaded the software it will automatically update the software after you log in. Step 2: Once you have logged in a screen with the latest cricut announcements and a list of your recent projects will come up like the image below. Click the New Project button in the top right corner or on the tile in the bottom left. Step 3: Click the Upload button in the bottom left. Like the image below. Step 4: The upload screen gives you the option of uploading an image or a pattern fill. For SVG files you want to upload an image. Click the Upload Image button. Step 5: Click on the browser button or drag a file from your computer onto the browser. The image below walks through the process of clicking the browser button. After clicking the browser button navigate to where your SVG has been saved on your computer. Click the open button on the file browser. Whether you drag your image onto the browser or use the browse button once an image has been selected the screen will automatically to go the next step. Step 6: The next screen gives you an opportunity to make sure the SVG you uploaded looks how you were expecting it to look. Go ahead and give your image a name and tags. The tags are words or short phrase that describe the SVG. After filling out that information click the Save button in the bottom right. Step 7: After the upload SVG process has been completed the upload screen will come up although this time the design that was just uploaded will be visible. Click the image(s) you would like added to your project and click the Insert Images button in the bottom right corner. Step 8: Once again you will be back to the My Project screen. Now that an SVG has been added there are several things that can be done to modify this design. To keep this tutorial simple we are going to resize the image and weld the pieces together. Resize image: To resize the image make sure the image is selected. When the image is selected there will be a blue border around it with circular buttons at each corner. In the top middle there is a section for size with options to change the width (W) and height (H). The lock button above those two options provides the option to constrain height and width proportions. Having this locked will ensure that the image you have selected doesn’t get squished. Welding the pieces. Pieces of the SVG files brought into the My Project area are handled as an individual item even multiple items are grouped together. Cricut will organize the individual shapes (or letters) individually in the next step. To solve that problem make sure the image has been selected (has a blue box around it) and click the weld button in the bottom right corner. This will ensure that the individual pieces are stuck together and the design can be cut as a design not individual pieces. The design on top has been welded while the one on the bottom has not in the screen shot below. On the right hand side the screen it will show you if the design is welded or just grouped together. Once your design has been resized to fit your project and the weld button has been selected click the Make it button in the top right. Step 9: After clicking the Make It button the Prepare Mats screen will come up next. Making sure the correct material size matches the size of the mat you will be using is important on this screen. Designs can be placed in specific spots by clicking and dragging it around the mat. Placed the image where desired click the Continue button in the bottom right. Step 10: Finally, plugin and power on your Cricut if this hasn’t already been done. Make sure that the material on this screen matches the type of material you will be using. If it is not correct turn the dial on your Cricut to the correct material. Finish by following the instructions on this page. Phew! That seems like a lot of work to cut one image! Don’t worry, with practice that process goes much quicker. The possibilities and projects are endless once you are comfortable uploading and using SVG files for your Cricut projects! Let your imagination run wild with projects you can make on your Cricut! Suggested Projects Using SVG Files A True Love Story Never Ends Simple Kitchen & Pantry Labels What projects have you recently made using your Cricut? [...] Read more...
Hello! Welcome to my blog and thank you for stopping by! I am Jaci Steffan. I am a graphic designer, web designer, wife, mom and homemaker. Steffan Design provides insights on a variety of topics from graphic and web design tips and tricks to bits and pieces of everyday life. Design After graduating from high school I developed a passion and love for graphic and web design. I attended Dixie State College and earned a degree in Information Technology with a Visual Technologies emphasis (basically a graphic and web design degree). Since starting my design journey I have contributed my design skills to a variety of realms including religious, government, small business, start-ups, and contract jobs. Design encompasses a large variety of mediums including logos and branding, package design, brochure, marketing design, and web design. I enjoy the variety that comes from this broad field. I have recently opened an etsy shop (Steffan Design) in hopes of providing affordable quality designs for decor projects. It has been a fun adventure so far! I have learned a lot and am excited to continue providing customers with quality designs. Homemaking Homemaking isn’t something I have always had a passion for. After having kids and being a stay-at-home-mom I have gained a desire to improving my kid’s life at home. Our homes should be a sanctuary for our families. They should be the safe zone from the demands and pressures of the outside world. Homemaking is the art of making a house fell like a home. It can be done a variety of ways like adding pictures, home decor, having a home cooked meal ready at dinnertime, and providing a positive uplifting atmosphere for our families. Mom Life When people say being a mom is more than a full time job they aren’t kidding! Being a mom can take as much or as little time as we are willing and able to put into it. My kids sure know how to keep me on my toes! Each phase they go through brings new experiences, challenges and joys to my life. Most moms have more experience than I do, but I am happy to share solutions to problems that I have encountered in hopes that it will help someone else in the same shoes I am in. Recipes Growing up I didn’t spend much time in the kitchen. While working an internship I temporarily lived with a co-worker and his wife. As a result they showed me that cooking can be simple, fun, and delicious. I have developed a love for freezer meals. They can be a lot of work up front, but they sure do pay off in the long run. So if a recipe works as a freezer meal it is definitely a bonus in my books!   In conclusion, a friend of mine once told me people that think they know a lot about a certain topic usually don’t know very much, and people that know a lot about a topic know there is always more to learn. I am by no means an expert in all of these topics, but I am excited to share what I do know about them. We all have had different life experiences that as a result provide us each with unique perspectives. Please feel free to leave insightful comments on my posts sharing your unique perspectives on these topics. [...] Read more...