A few years ago my husband gave me a Cricut for Christmas. It have had so much fun with it! Consequently I have made several projects like wall decals, quotes on picture frames, stencils for painting projects and glass etching, shapes for making cards, fabric for iron on onesies, and even a felt quite book. I haven’t even touched the surface with all of the things this machine can do! It has been so much fun to plug in a SVG file and watch my Cricut cut it out perfectly!
Today I want to show you how to cut an SVG file out with the Cricut design center. From my experience using SVG files has given me the best quality cuts. Since SVG files are vector based it doesn’t matter how large or small the SVG is it will always retain its quality.
Step by Step Instructions
Step 1:
With your preferred browser open go to cricut.com/design. If you don’t already have an account please create one. Once you sign in if you are using the design center for the first time cricut.com/design will ask you if it is okay to install the software. Go ahead and follow the prompts to do so. Occasionally after you have downloaded the software it will automatically update the software after you log in.
Step 2:
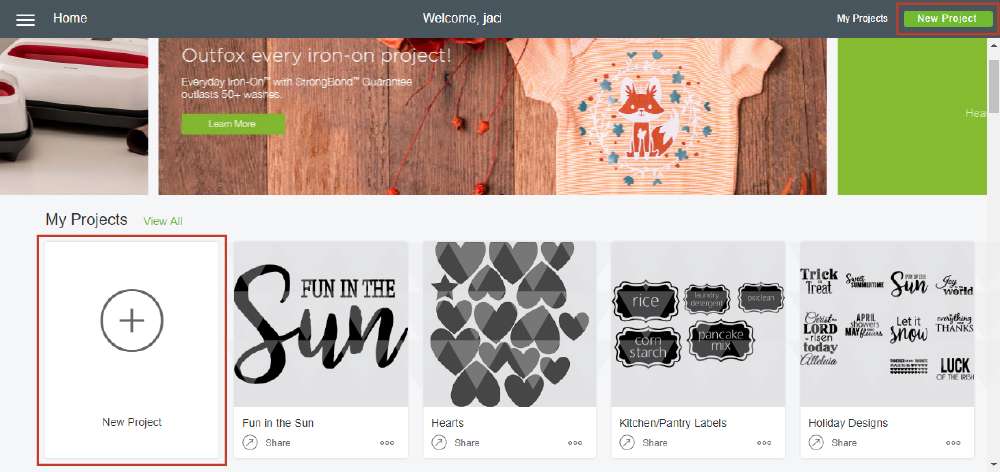
Once you have logged in a screen with the latest cricut announcements and a list of your recent projects will come up like the image below. Click the New Project button in the top right corner or on the tile in the bottom left.
Step 3:
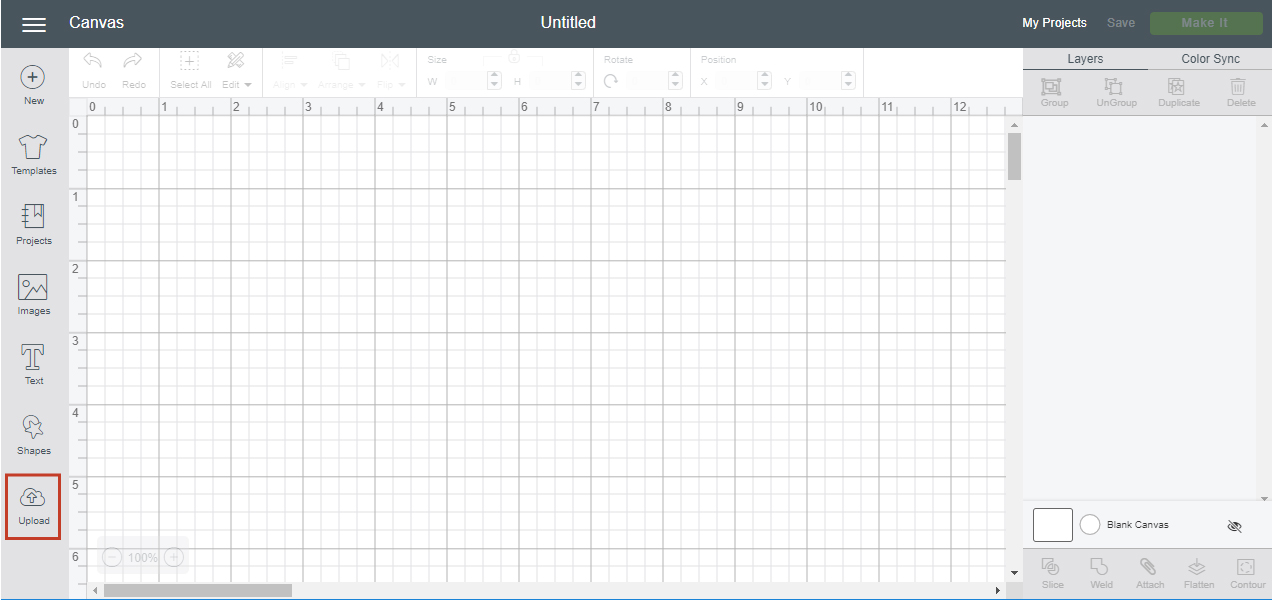
Click the Upload button in the bottom left. Like the image below.
Step 4:
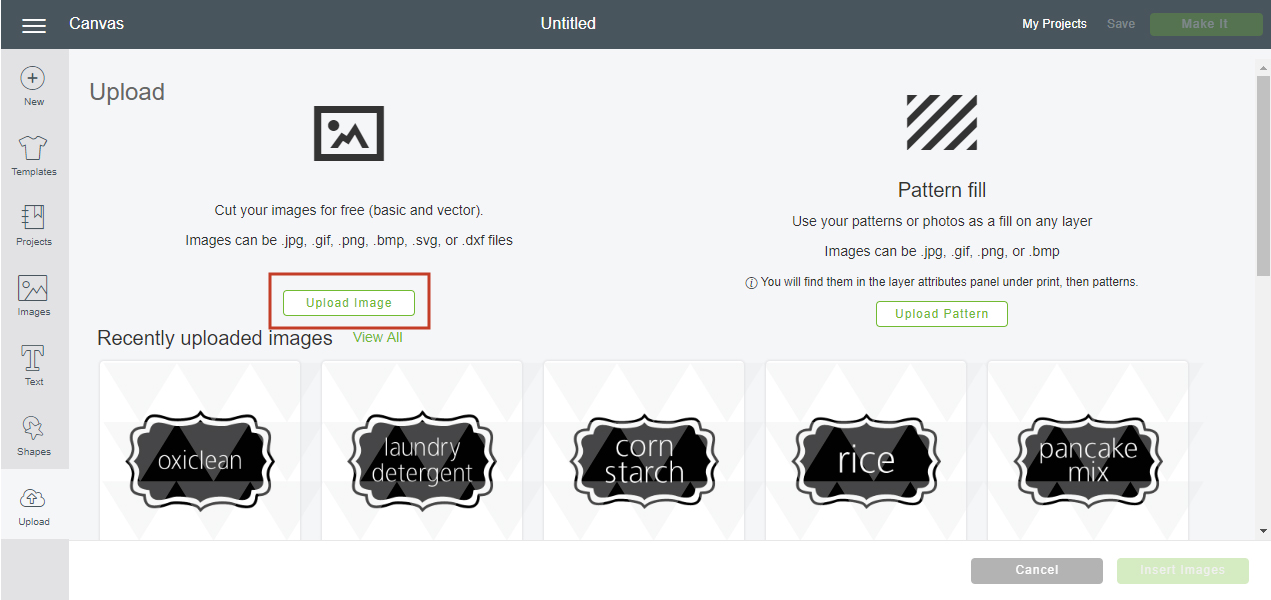
The upload screen gives you the option of uploading an image or a pattern fill. For SVG files you want to upload an image. Click the Upload Image button.
Step 5:
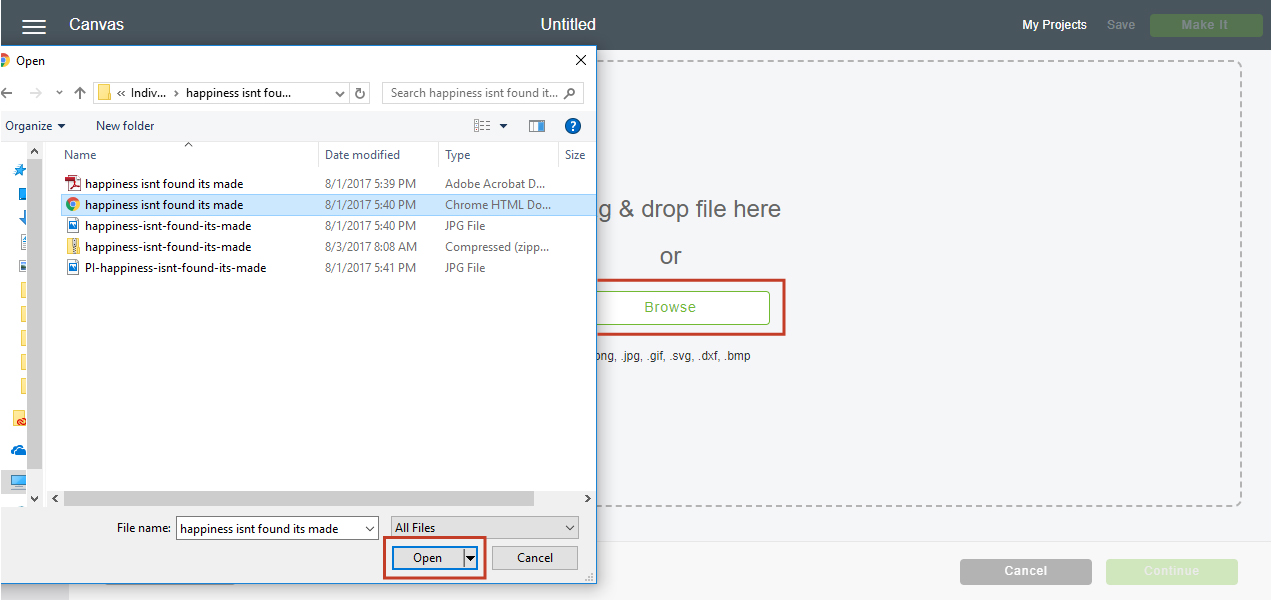
Click on the browser button or drag a file from your computer onto the browser. The image below walks through the process of clicking the browser button. After clicking the browser button navigate to where your SVG has been saved on your computer. Click the open button on the file browser. Whether you drag your image onto the browser or use the browse button once an image has been selected the screen will automatically to go the next step.
Step 6:
The next screen gives you an opportunity to make sure the SVG you uploaded looks how you were expecting it to look. Go ahead and give your image a name and tags. The tags are words or short phrase that describe the SVG. After filling out that information click the Save button in the bottom right.

Step 7:
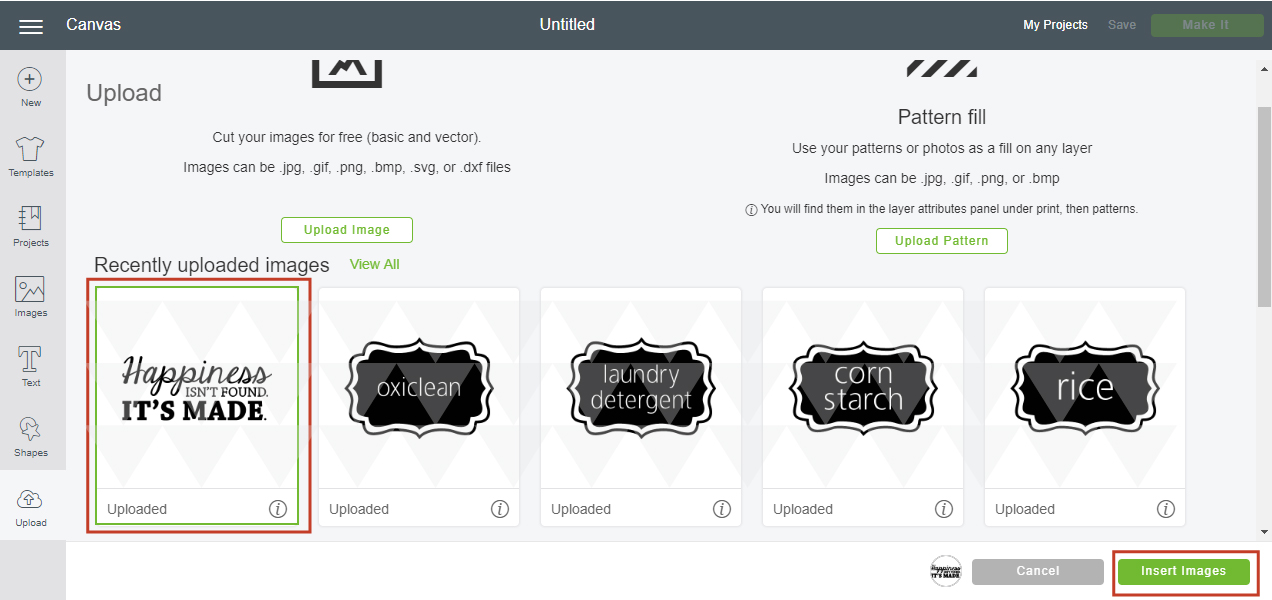
After the upload SVG process has been completed the upload screen will come up although this time the design that was just uploaded will be visible. Click the image(s) you would like added to your project and click the Insert Images button in the bottom right corner.
Step 8:
Once again you will be back to the My Project screen. Now that an SVG has been added there are several things that can be done to modify this design. To keep this tutorial simple we are going to resize the image and weld the pieces together.
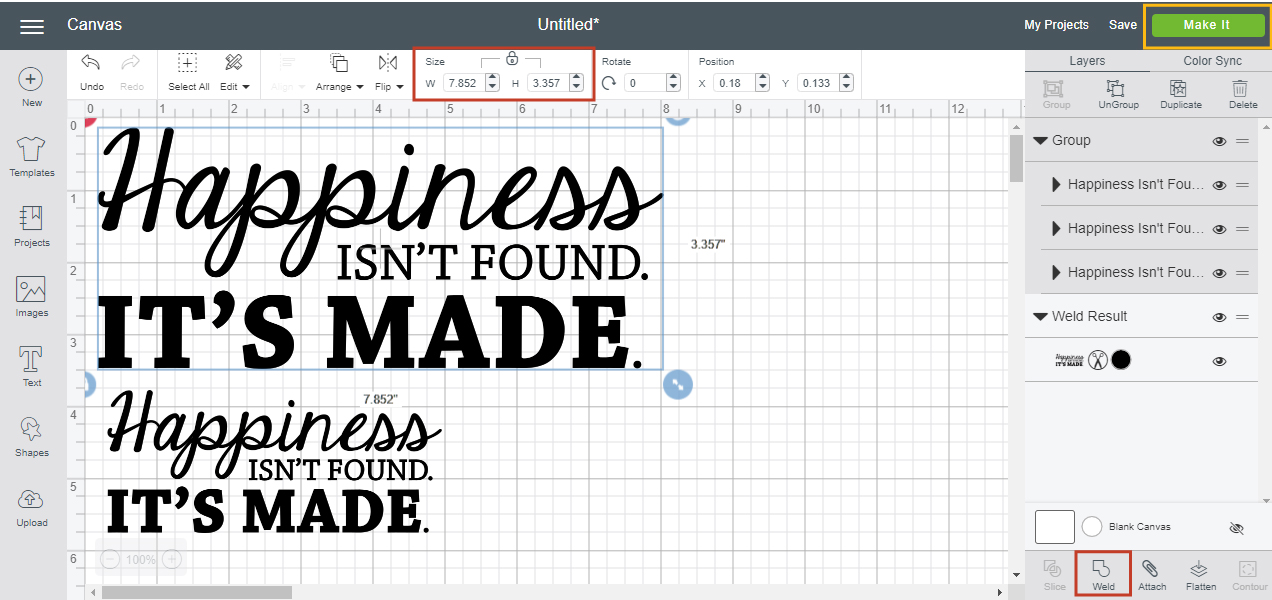
- Resize image: To resize the image make sure the image is selected. When the image is selected there will be a blue border around it with circular buttons at each corner. In the top middle there is a section for size with options to change the width (W) and height (H). The lock button above those two options provides the option to constrain height and width proportions. Having this locked will ensure that the image you have selected doesn’t get squished.
- Welding the pieces. Pieces of the SVG files brought into the My Project area are handled as an individual item even multiple items are grouped together. Cricut will organize the individual shapes (or letters) individually in the next step. To solve that problem make sure the image has been selected (has a blue box around it) and click the weld button in the bottom right corner. This will ensure that the individual pieces are stuck together and the design can be cut as a design not individual pieces.
The design on top has been welded while the one on the bottom has not in the screen shot below. On the right hand side the screen it will show you if the design is welded or just grouped together. Once your design has been resized to fit your project and the weld button has been selected click the Make it button in the top right.
Step 9:
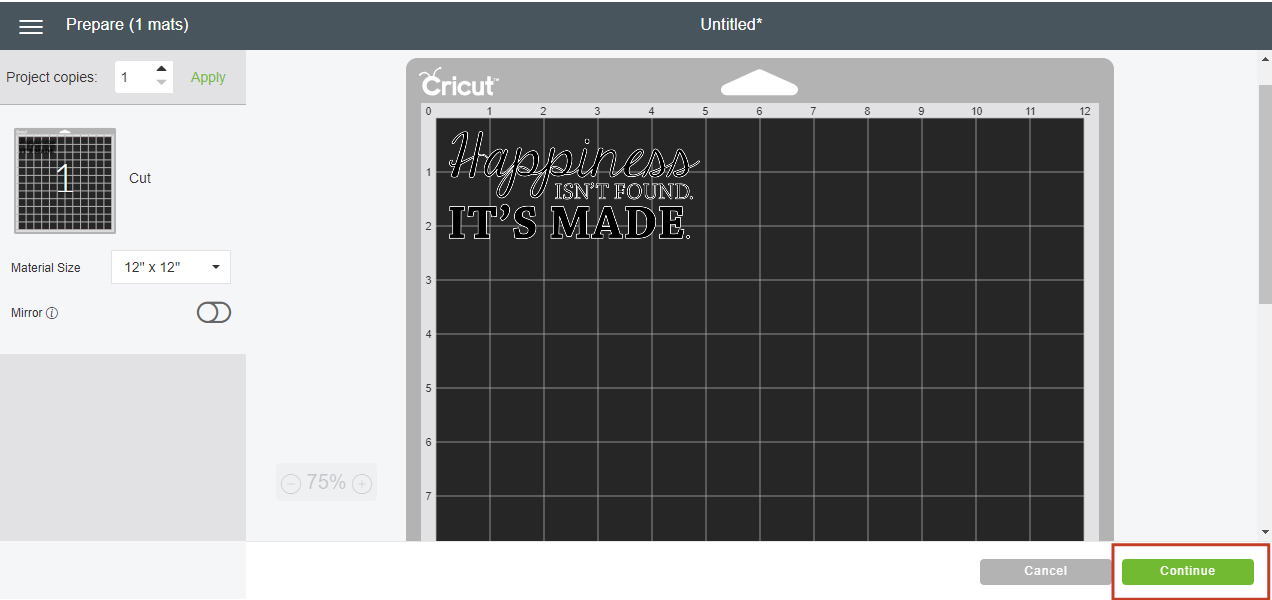
After clicking the Make It button the Prepare Mats screen will come up next. Making sure the correct material size matches the size of the mat you will be using is important on this screen. Designs can be placed in specific spots by clicking and dragging it around the mat. Placed the image where desired click the Continue button in the bottom right.
Step 10:
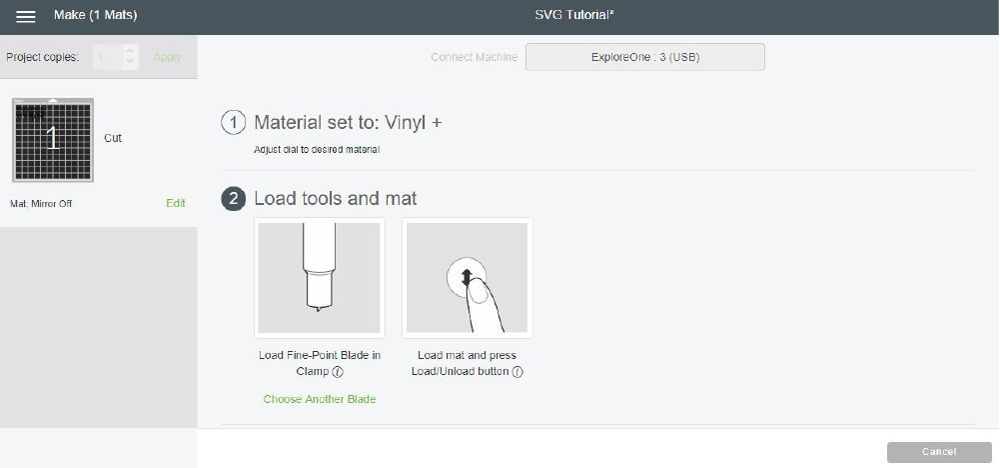
Finally, plugin and power on your Cricut if this hasn’t already been done. Make sure that the material on this screen matches the type of material you will be using. If it is not correct turn the dial on your Cricut to the correct material. Finish by following the instructions on this page.
Phew! That seems like a lot of work to cut one image! Don’t worry, with practice that process goes much quicker. The possibilities and projects are endless once you are comfortable uploading and using SVG files for your Cricut projects! Let your imagination run wild with projects you can make on your Cricut!
Suggested Projects Using SVG Files

What projects have you recently made using your Cricut?